Cubrebotas DIY: Boho ankle boots
sábado, noviembre 28, 2015
¡Hola chicos! ¿Qué tal? Tal y como dice el título, hoy os traigo un "Hazlo Tú Mismo" donde os mostraré cómo personalizar unos botines para darles un aspecto más bohemio o folk. Se trata de algo parecido a una pulsera, pero que colocaremos en nuestros botines cuando queramos un look más hippie, porque sí, son de quita y pon: no hay peligro! jajajaja!
Hi guys! How are you? As the title says, today I bring you a "Do It Yourself" project. I gonna show you how to customize a pair od booties to give them a bohemiam-folk look. It's kind of a bangle, but we just place it around the top of our booties when we want to give them a hippier look. And yes, they're removable: no danger!!! hahaha!
Creerme, lo más difícil es elegir el diseño y los materiales. Las posibilidades son infinitas y lo que más cuesta es decidirse. El resto ya vais a ver que es muy sencillo y como herramientas de trabajo sólo necesitareis tijeras y pegamento textil (de manera opcional, aguja e hilo). Os voy a enseñar el paso a paso de mi versión, que tiene un aspecto boho-folk que me encanta. Espero que os guste:
Trust me, the hardest thing is to decide the design and the materials. There are so many possibilities that the hardest thing is to pick one. You'll see that the rest is very simple and the only work tools you will need are a pair of scissors and textile glue (optionally a needle and some thread). I'm going to show you how I do "my version", step by step, getting a boho-folk look that I love. I hope you like it:
Necesitamos ... / We need...
Probamos el diseño con ayuda de pinzas o clips, teniendo en cuenta:
- En la parte superior necesitaremos una cinta, cordón o cadena para atar
- Cuidado con la altura, hay que evitar que nuestro cubrebotas arrastre por el suelo
- Si el contorno superior o cuello del botín tiene forma (en este caso cae ligeramente en la parte delantera), hay que seguirlo para que quede más ajustado, con lo cual necesitaremos algún centímetro más. Esto es importante antes de cortar la medida definitiva: siempre probarlo antes sobre el botín.
At first, we try the design over the booties with clips or tweezers, keeping in mind:
- We need a ribbon, cord or string to tie at the top of the booties
- Careful with the height of the coverboots, it mustn't scuff with the floor
- If the top edge or collar of the bootie has some shape (in my case it falls slightly at the front), we have to follow this contour in order to our coverboots fits completelly on the bootie. So we'll probably need some more centimeters. This is an important step before cutting the final measure: try it over the bootie before to cut.
Después de probar sobre el botín, cortamos las medidas definitivas de las cintas, etc. Para que os hagáis una idea aproximada de las medidas a la hora de comprar, yo he necesitado unos 30 cm. para las cintas y 50 cm. para el cordón de atar.
After trying on the bootie, we cut the tapes etc. with the definitive measures. To give you a rough idea of the measures, for buying at the shop, I needed about 30cm. for all the tapes and 50cm. of cord to tie.
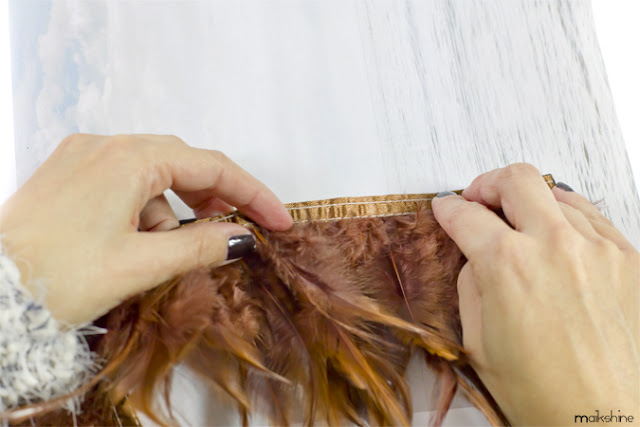
Vamos pegando las cintas según el diseño que queremos realizar, dejando algo de tiempo entre pasos para asegurarnos que el pegamento esté seco y no se mueva nada.
We glue the tapes according to the design we want to do, leaving some time between steps to ensure that the glue is dry and do not move anything.
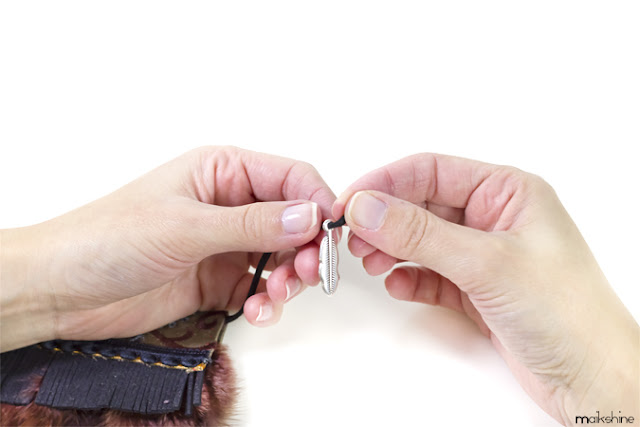
Como toque final, he anudado unos adornos metálicos al final del cordón, para que cuelguen y le aporte un toque divertido a la parte trasera de nuestros botines.
As a final touch, I knotted some metallic accessories at the end of the cord to give a kinda funny aspect at the backside of the booties.
Y... aquí están: nuestros nuevos botines boho! Biennnn!!! Al final, con algo de material que me sobró, se me ocurrió personalizar también un sombrero. Os pongo una foto también para daros alguna idea, es muy sencillo.
And... here they are: our new boho booties! Yayyyy!!! At the end, I used some leftover materials to customize a hat. I also put a photo to give you an idea, it's quite easy.
¿Qué os parece el resultado? Espero que os haya gustado tanto como a mí y os animéis a hacer vuestros propios diseños. ¡Puedes hacerlo! ;)
¿What do you think about the final result? I hope you like it as much as I do and I dare you to do your own designs. You can do it! ;)
Hasta pronto! Un besito! ;)
See you soon! XO


4 comentarios
De los DIY que más me gustan!!! muy chula la combinación que has hecho con los botines... Pero la idea del sombreo es lo más...ME ENCANTA !!! Besitos
ResponderEliminarMadre mia!! este DIY es lo más de lo más. Genial ;) Me ha encantado. Y queda fenomenal.
ResponderEliminarUn empujoncillo a esta semana taaaan, taaaan fria. ¡¡Mil besos!! Estamos en contacto
Un DIY ideal!! Me encanta como quedan de bonitas las botas, es genial!!
ResponderEliminarhttp://dosqueavecesson3.blogspot.com.es/2015/11/are-you-ready-boots.html
Thanks a lot, Marzia! ;) XOXO
ResponderEliminarMuchas gracias por tu comentario ;)